.png?fit=max&auto=format&n=ML35RDblT1Ol-zJb&q=85&s=062e79ad9c4540929eec204aff020178)
.png?fit=max&auto=format&n=ML35RDblT1Ol-zJb&q=85&s=f6328956931c9664a2a070c2edb6e9b3)
Prerequisites
Before you begin, ensure that you have:- An active API key with the necessary write permissions configured for the target environment (Sandbox or Live).
The Plan
In this guide, we will cover:- Navigating to Tron Gas Manager
- Activating the Gas Manager on your workspace
- Funding the Gas Manager
Step 1: Navigate to Tron Gas Manager
- Log into the OpenXSwitch Console.
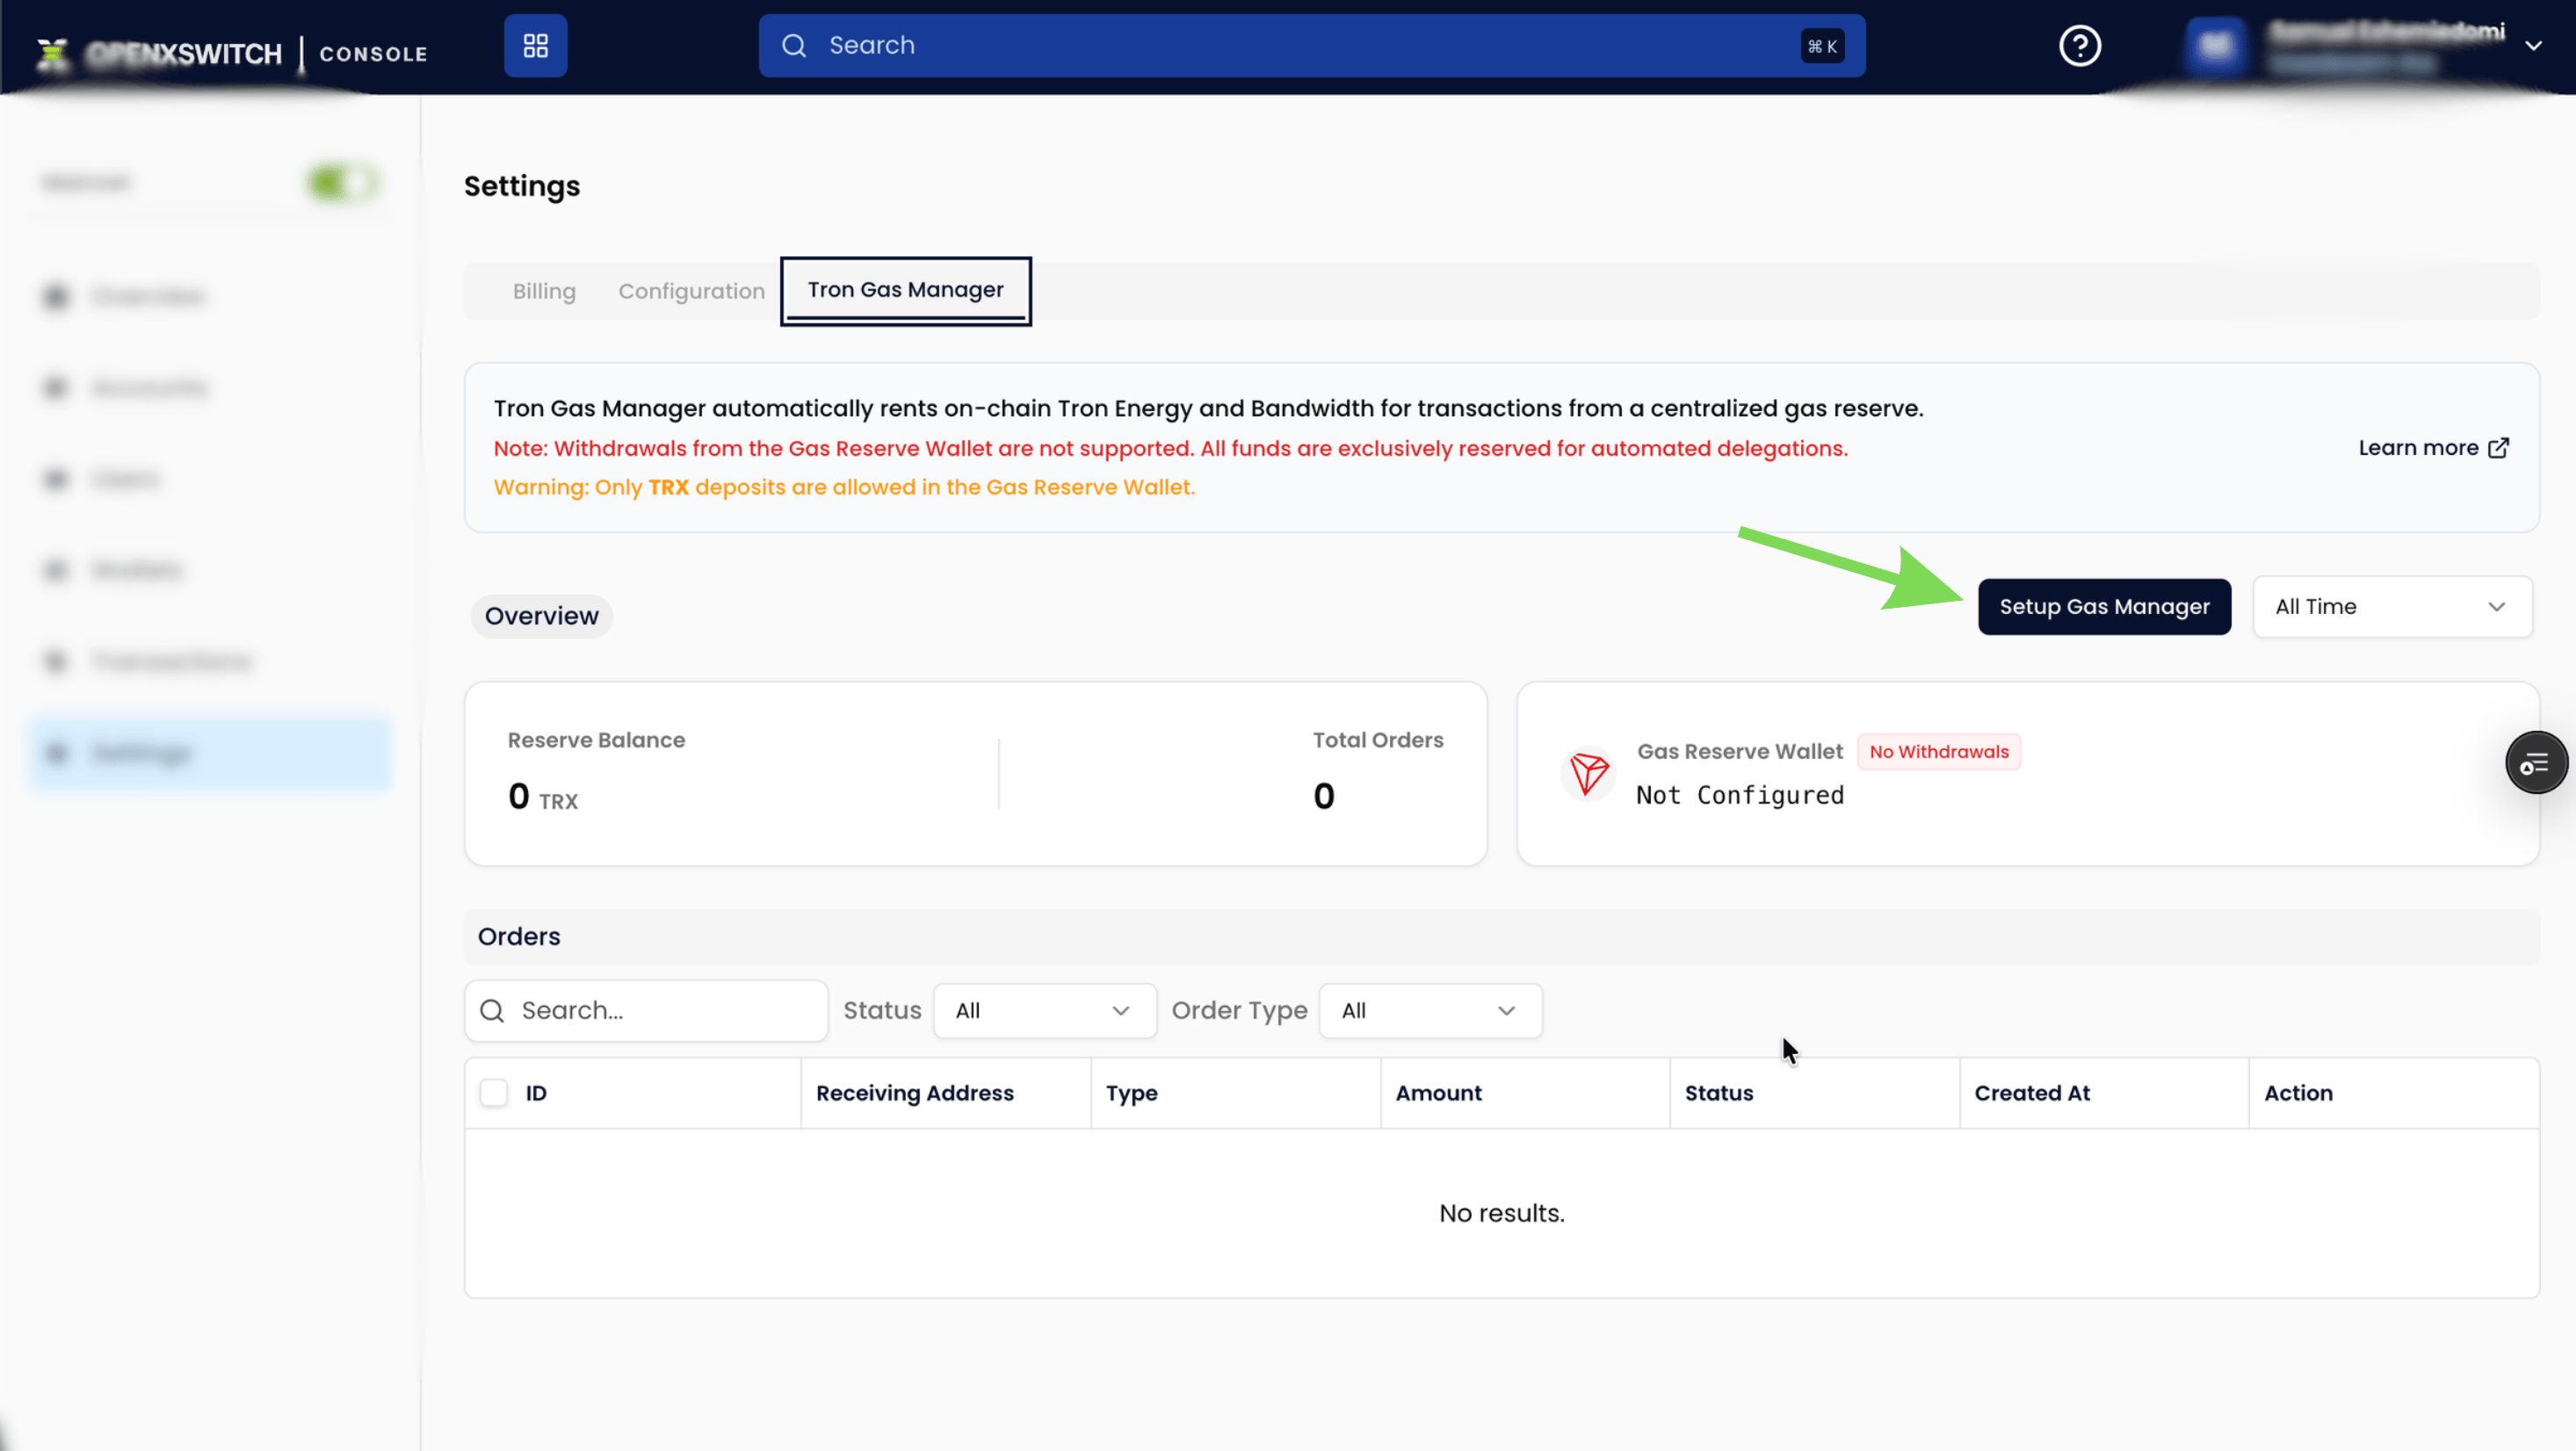
- From the left navigation menu, navigate to Wallet Infrastructure → Settings → Tron Gas Manager.
Step 2: Activate the Gas Manager
- Click the Setup Gas Manager button.
- A confirmation modal will appear detailing the automated delegation workflow.
- Confirm the setup to generate a dedicated TRON wallet specifically assigned to manage workspace gas sponsorship and account activations.
Step 3: Fund the Gas Manager
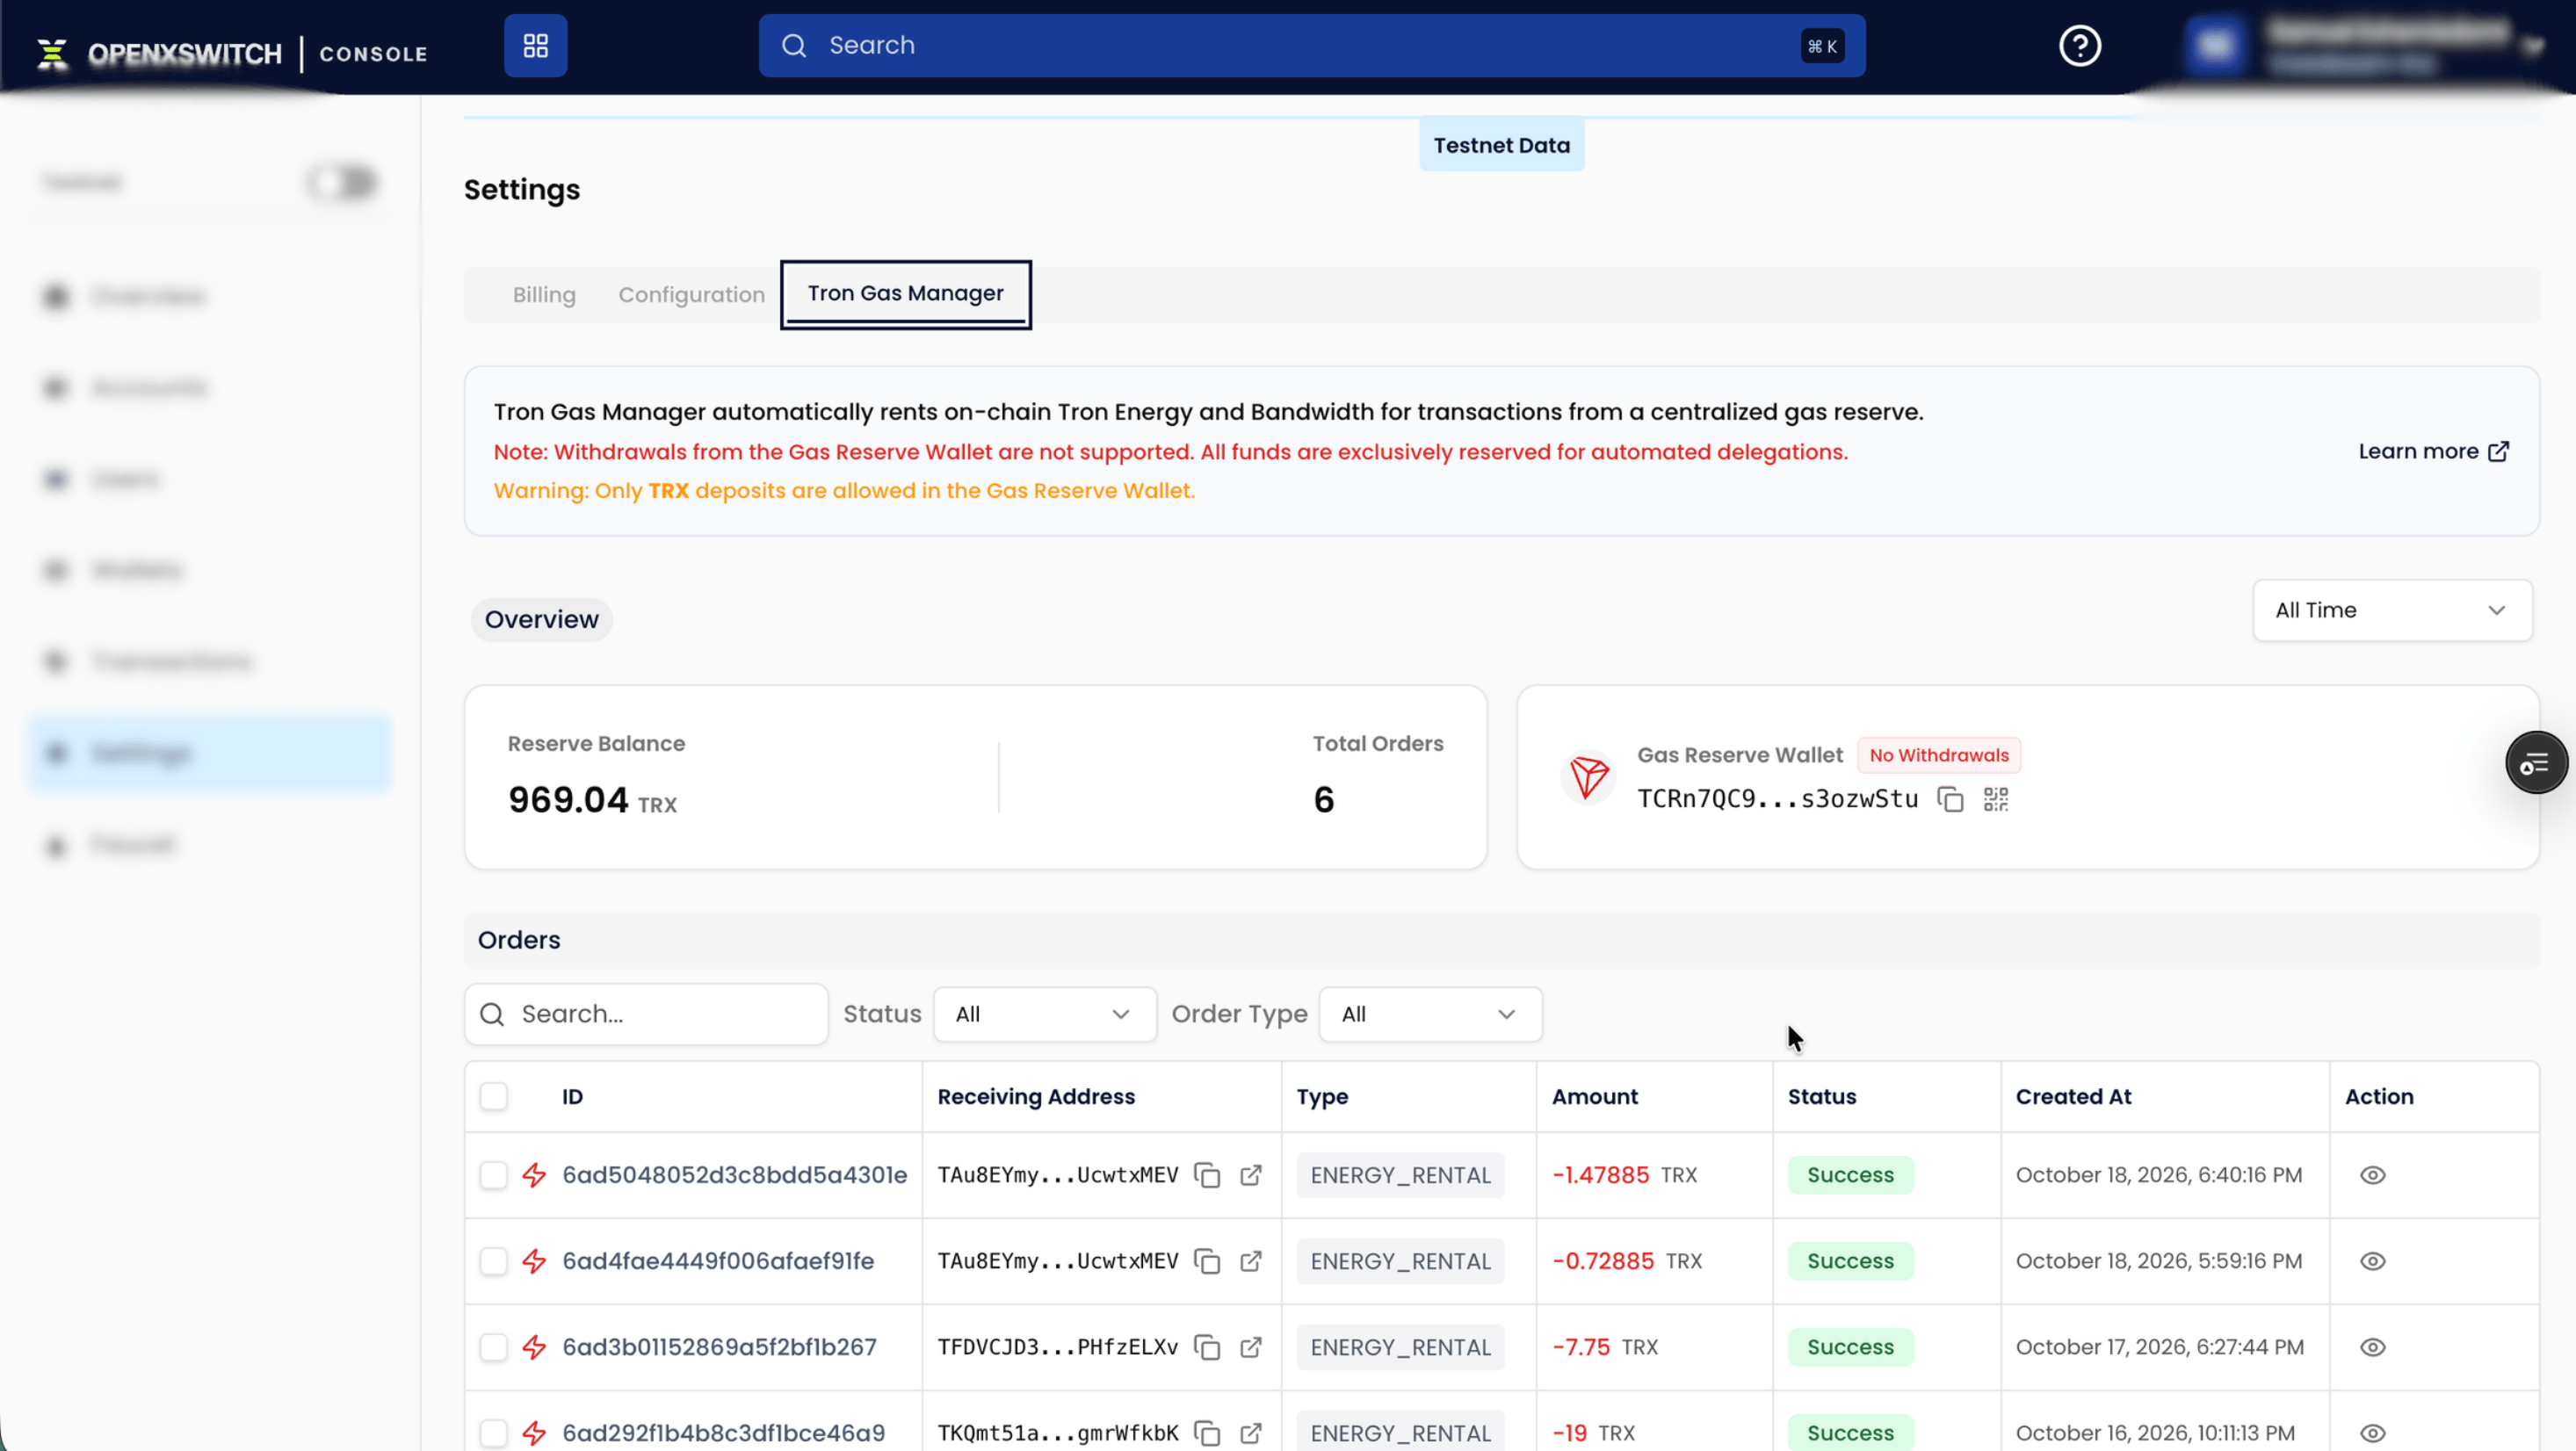
- Copy the generated Tron Gas Manager wallet address from the console.
- Deposit native TRX into the address:
- Testnet (Nile): Request testnet TRX via the Nileex TRON Faucet.
- Mainnet: Transfer TRX directly to the dedicated wallet address.
- Once the deposit is confirmed on-chain, the Tron Gas Manager automatically handles Energy delegation, Bandwidth allocation, and account activation whenever workspace addresses initiate USDT or TRC-20 token transfers.
Step 4: Next Steps
- Create and Manage Wallets: Deploy chain-specific smart wallets or deposit addresses linked directly to your users.
- Send and Transfer Tokens: Programmatically move digital assets from a specified wallet address to an external or internal recipient address.